This post is sponsored by Luminar, AI-based, award-winning photo editing software. We’ve also partnered to bring you a Quest! We want to see your best edits. Enter here.
Luminar is a very handy tool to improve your photo editing workflow and help you speed up photo edits that would normally take a lot more time. Together, we will go through a few editing tips for a portrait shot to show you the versatility and power of the software.
Getting Started
To get started, download the free Luminar trial. It doesn’t require a credit card to get started, and if you decide to get it once the trial is over, you only pay once, and own it forever, as it is not a subscription.
Best of all, it works as a plugin or as a standalone program, so we’ll start with a plugin. During Luminar installation you’ll need to follow the steps to install the plugin files, so that you can follow the workflow below.
Starting from Lightroom
I selected a portrait photo I took in Kyoto, Japan. It is easy to sort and select photos in Lightroom, so this is where I have my favorites, like this one. For some, it might be the most intuitive digital photography workflow to cull and edit your photos.
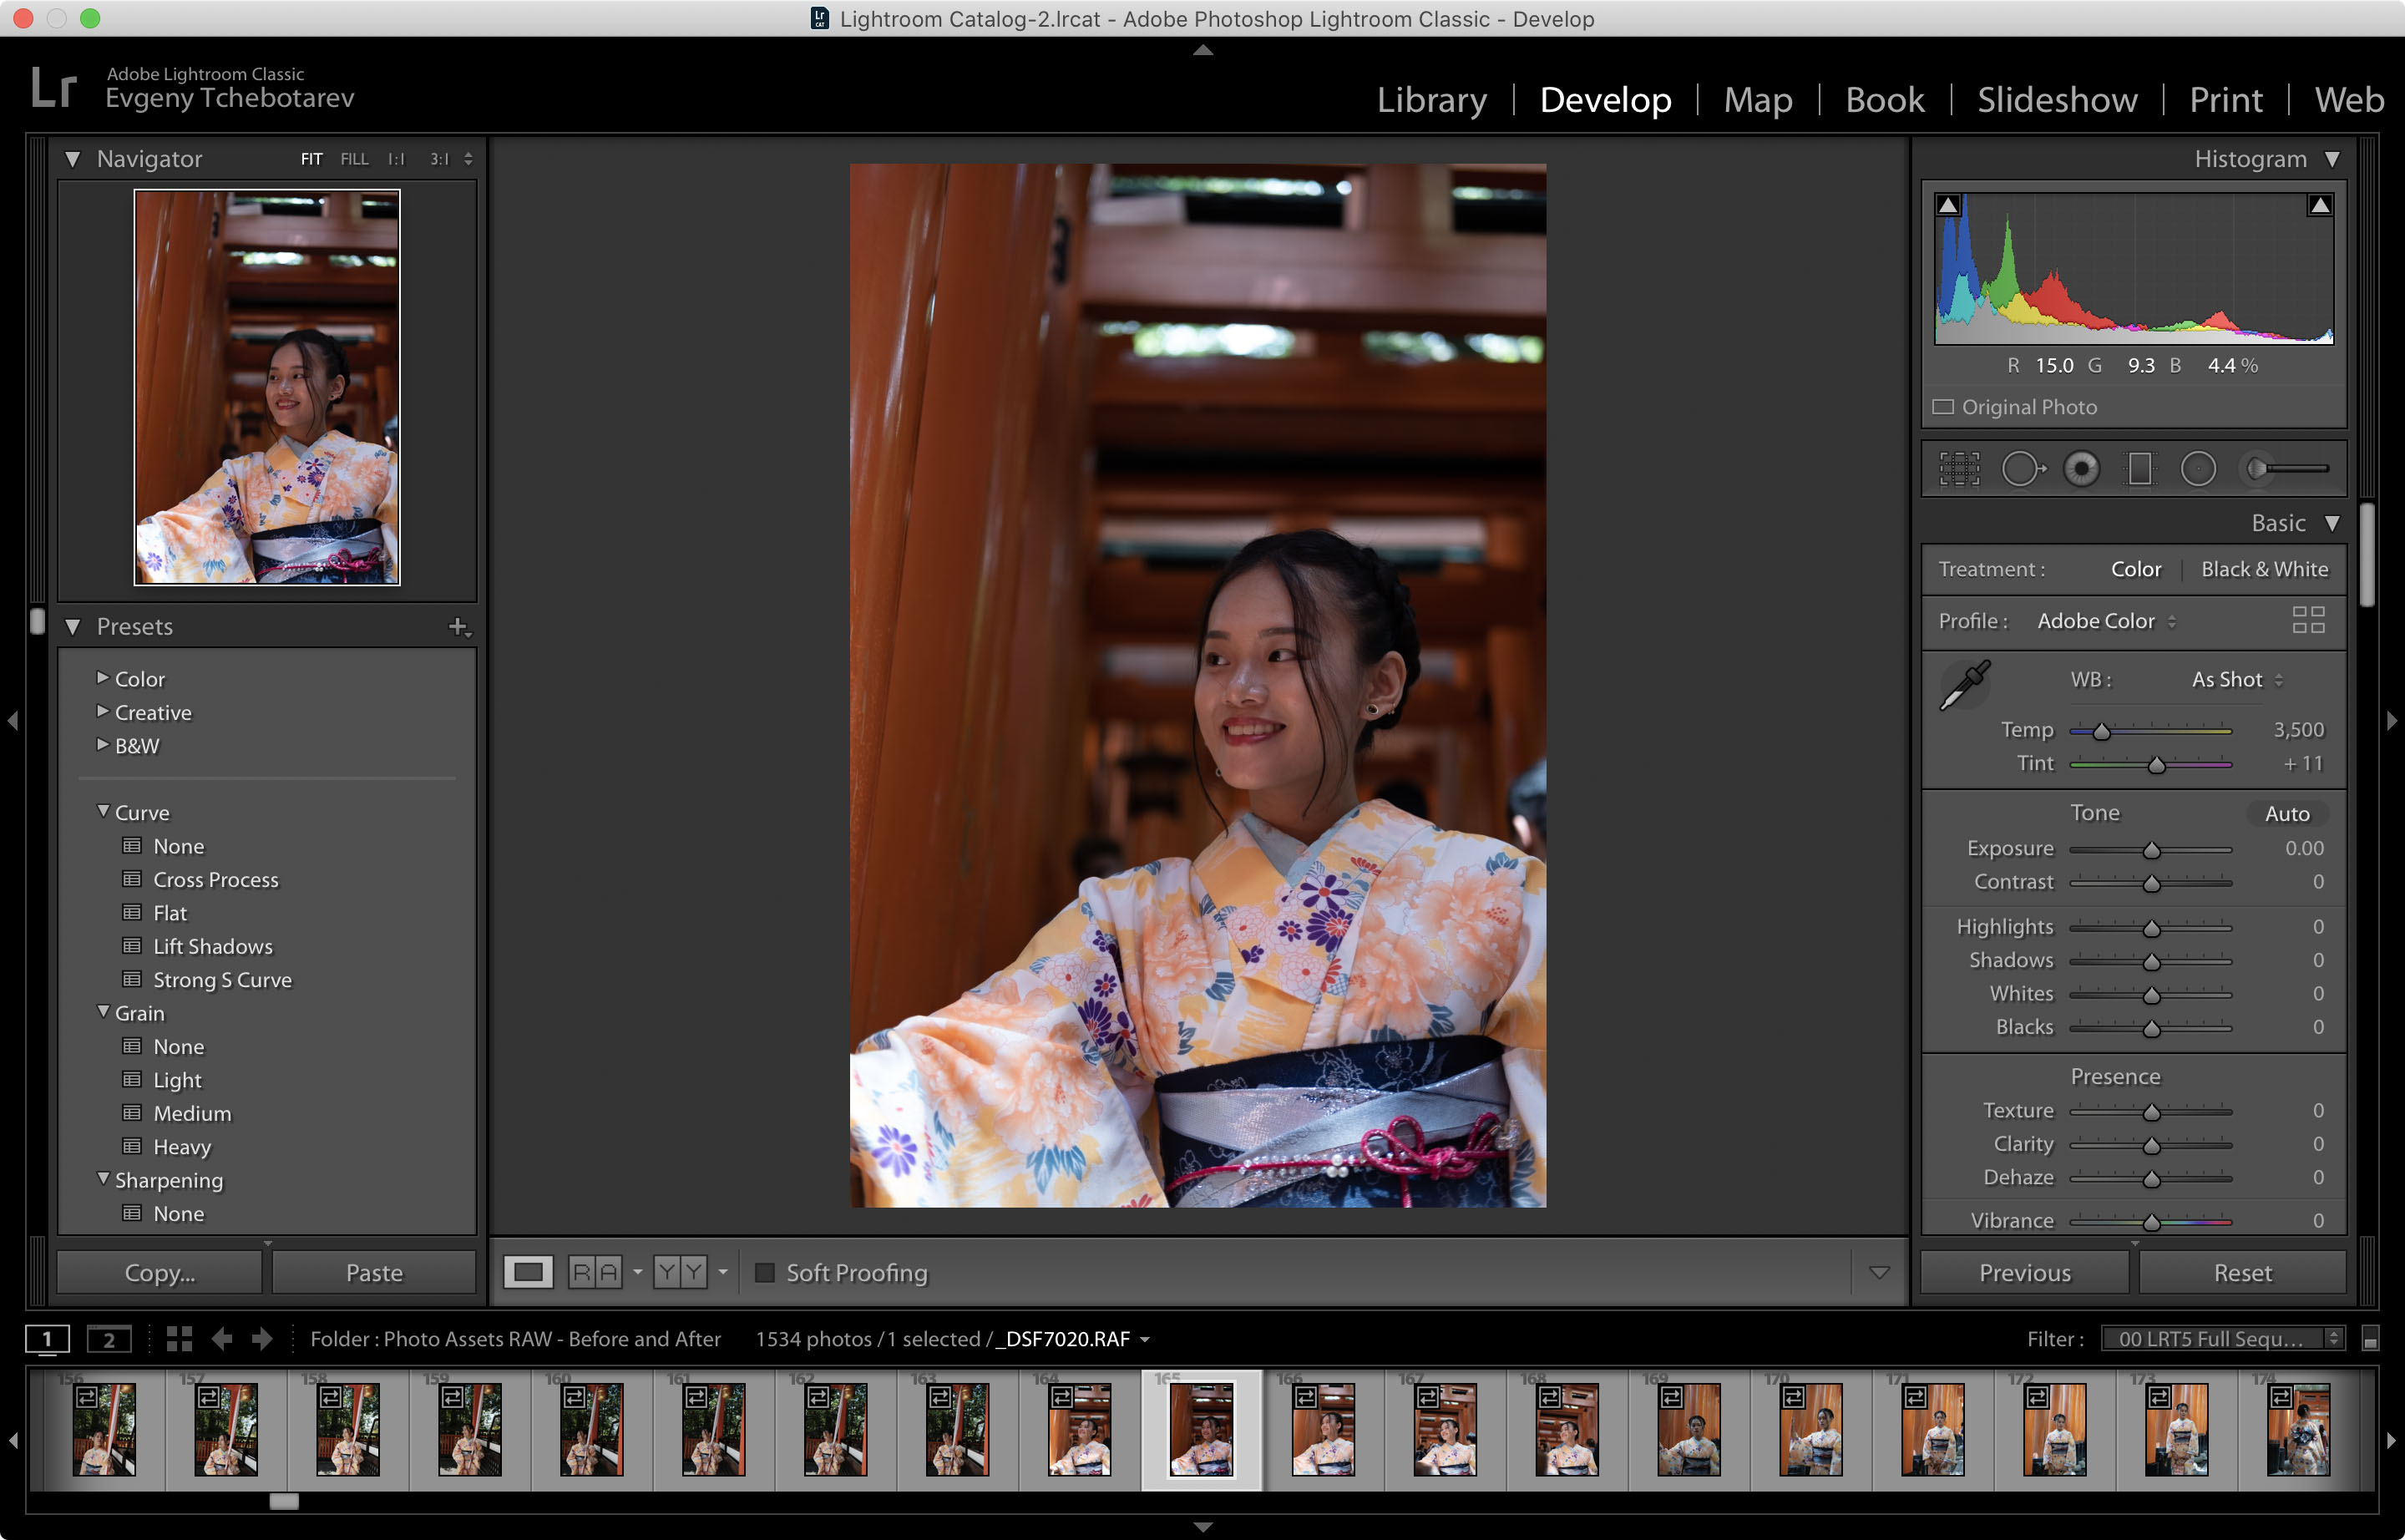
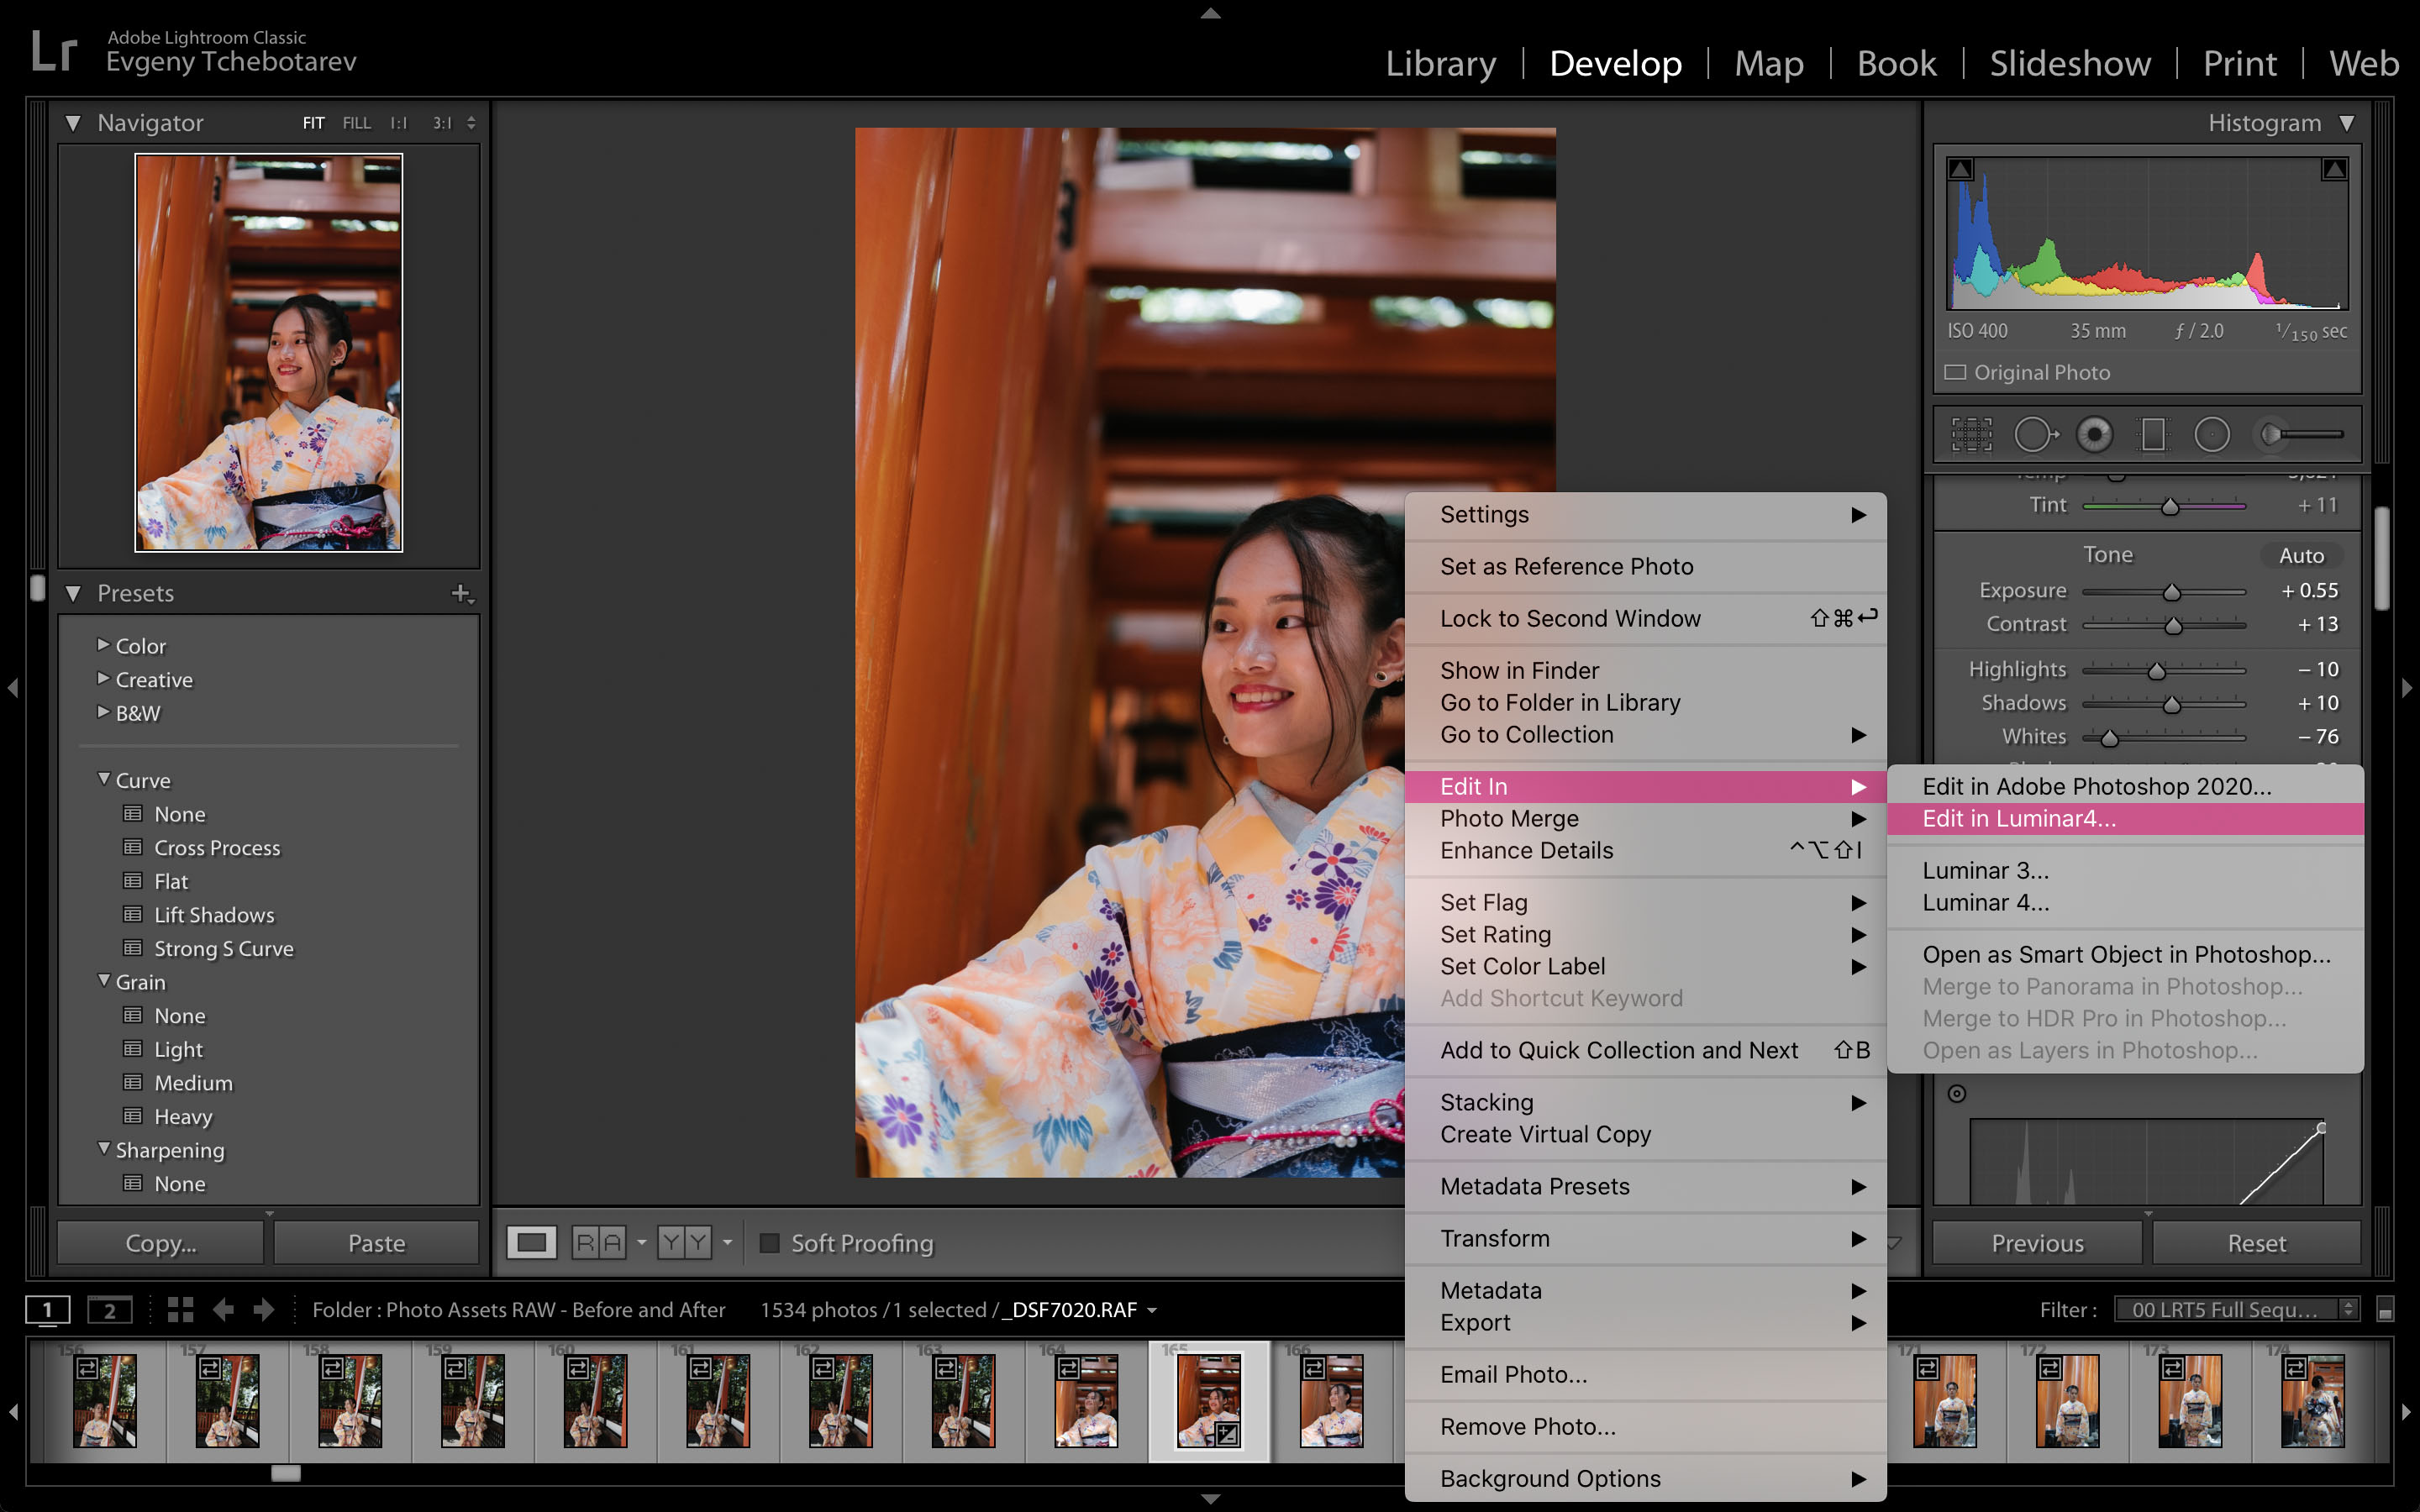
I’ll start with basic adjustments and make it look better. Once these edits are done (exposure, contrast, highlights, shadows, slight changes to HSL, split toning, and basic sharpening to get the initial tone right), I right click on the image, select Edit In > Luminar 4.
AI tools in Luminar
In Luminar, I’ll go right to the Portrait tab (on the right side), and select AI Skin Enhancer. This is where AI kicks in. With a simple slider, I can do professional-quality (frequency separation style technique) skin retouching, without ever going to creating layers or following complex retouching tutorials.
The second slider is for Shine Removal, which just launched in Luminar 4.2 and brand-new to any digital editing workflow, which magically restores texture in places where there is excessive shine on the skin. For outdoor portraits, where it’s often just you and your model, it’s hard to keep an eye on lighting or makeup, making shine removal an essential tool.
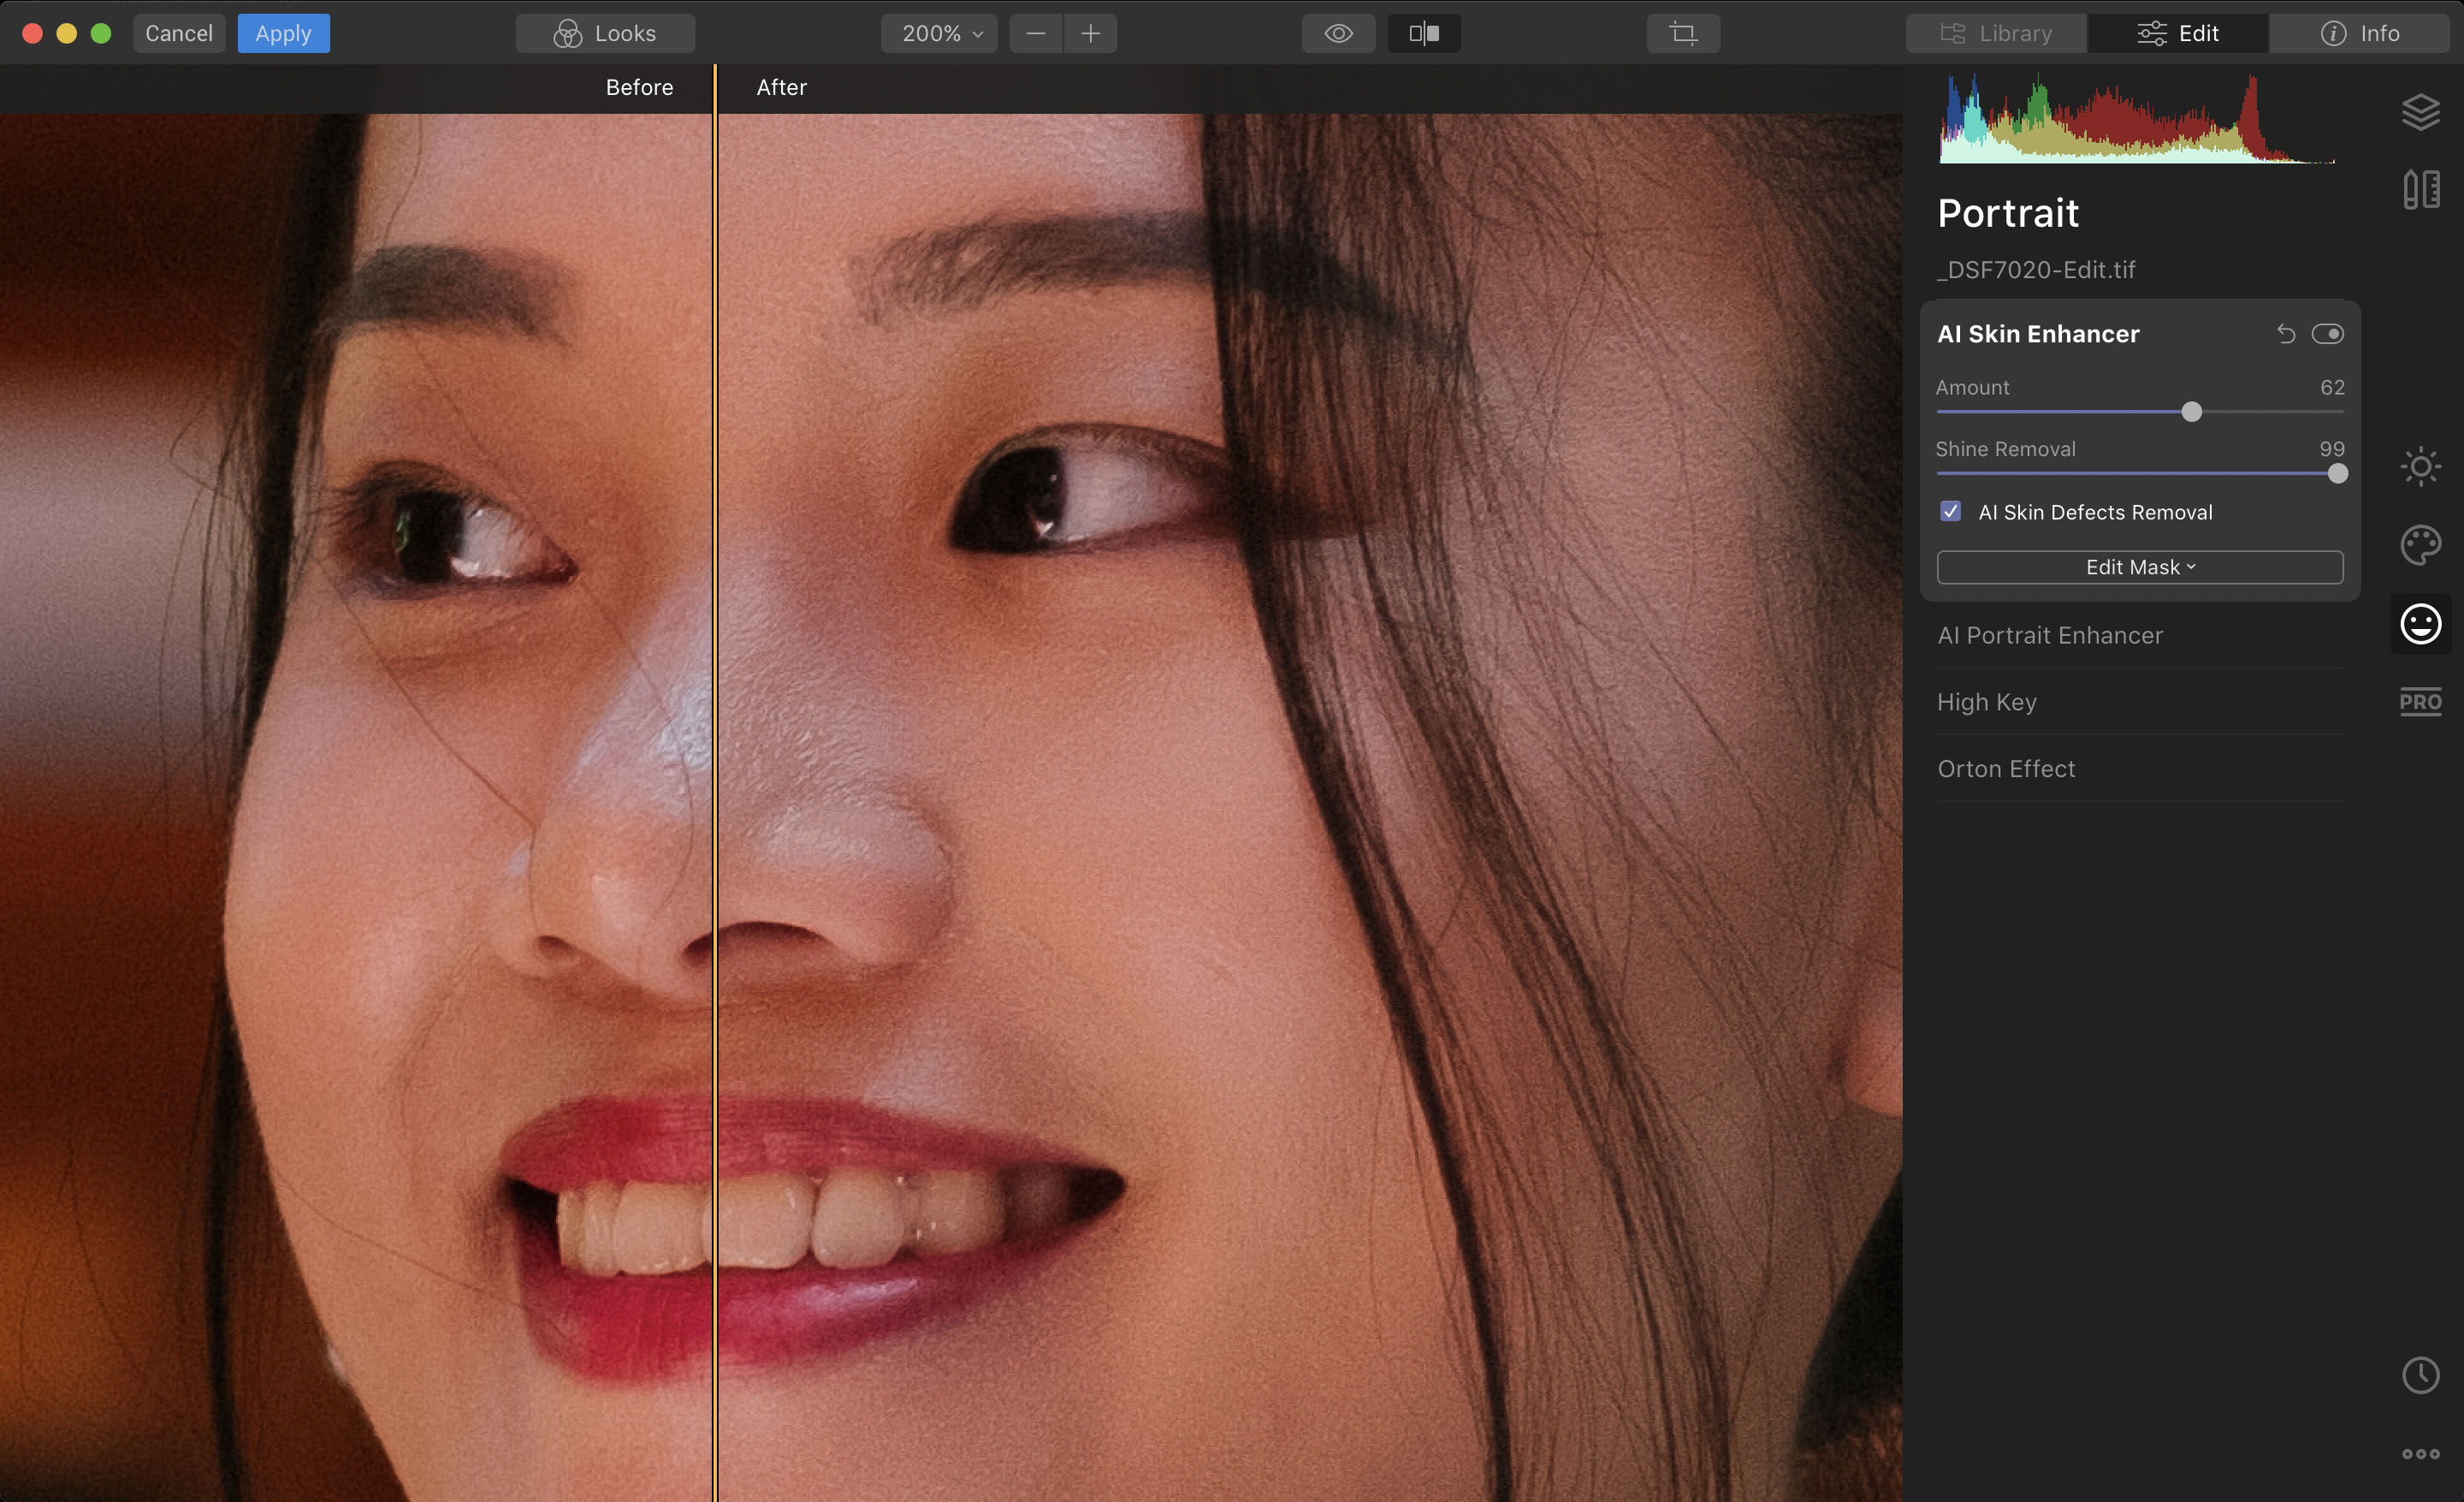
A quick comparison of AI Skin Enhancer and Shine Removal in action.
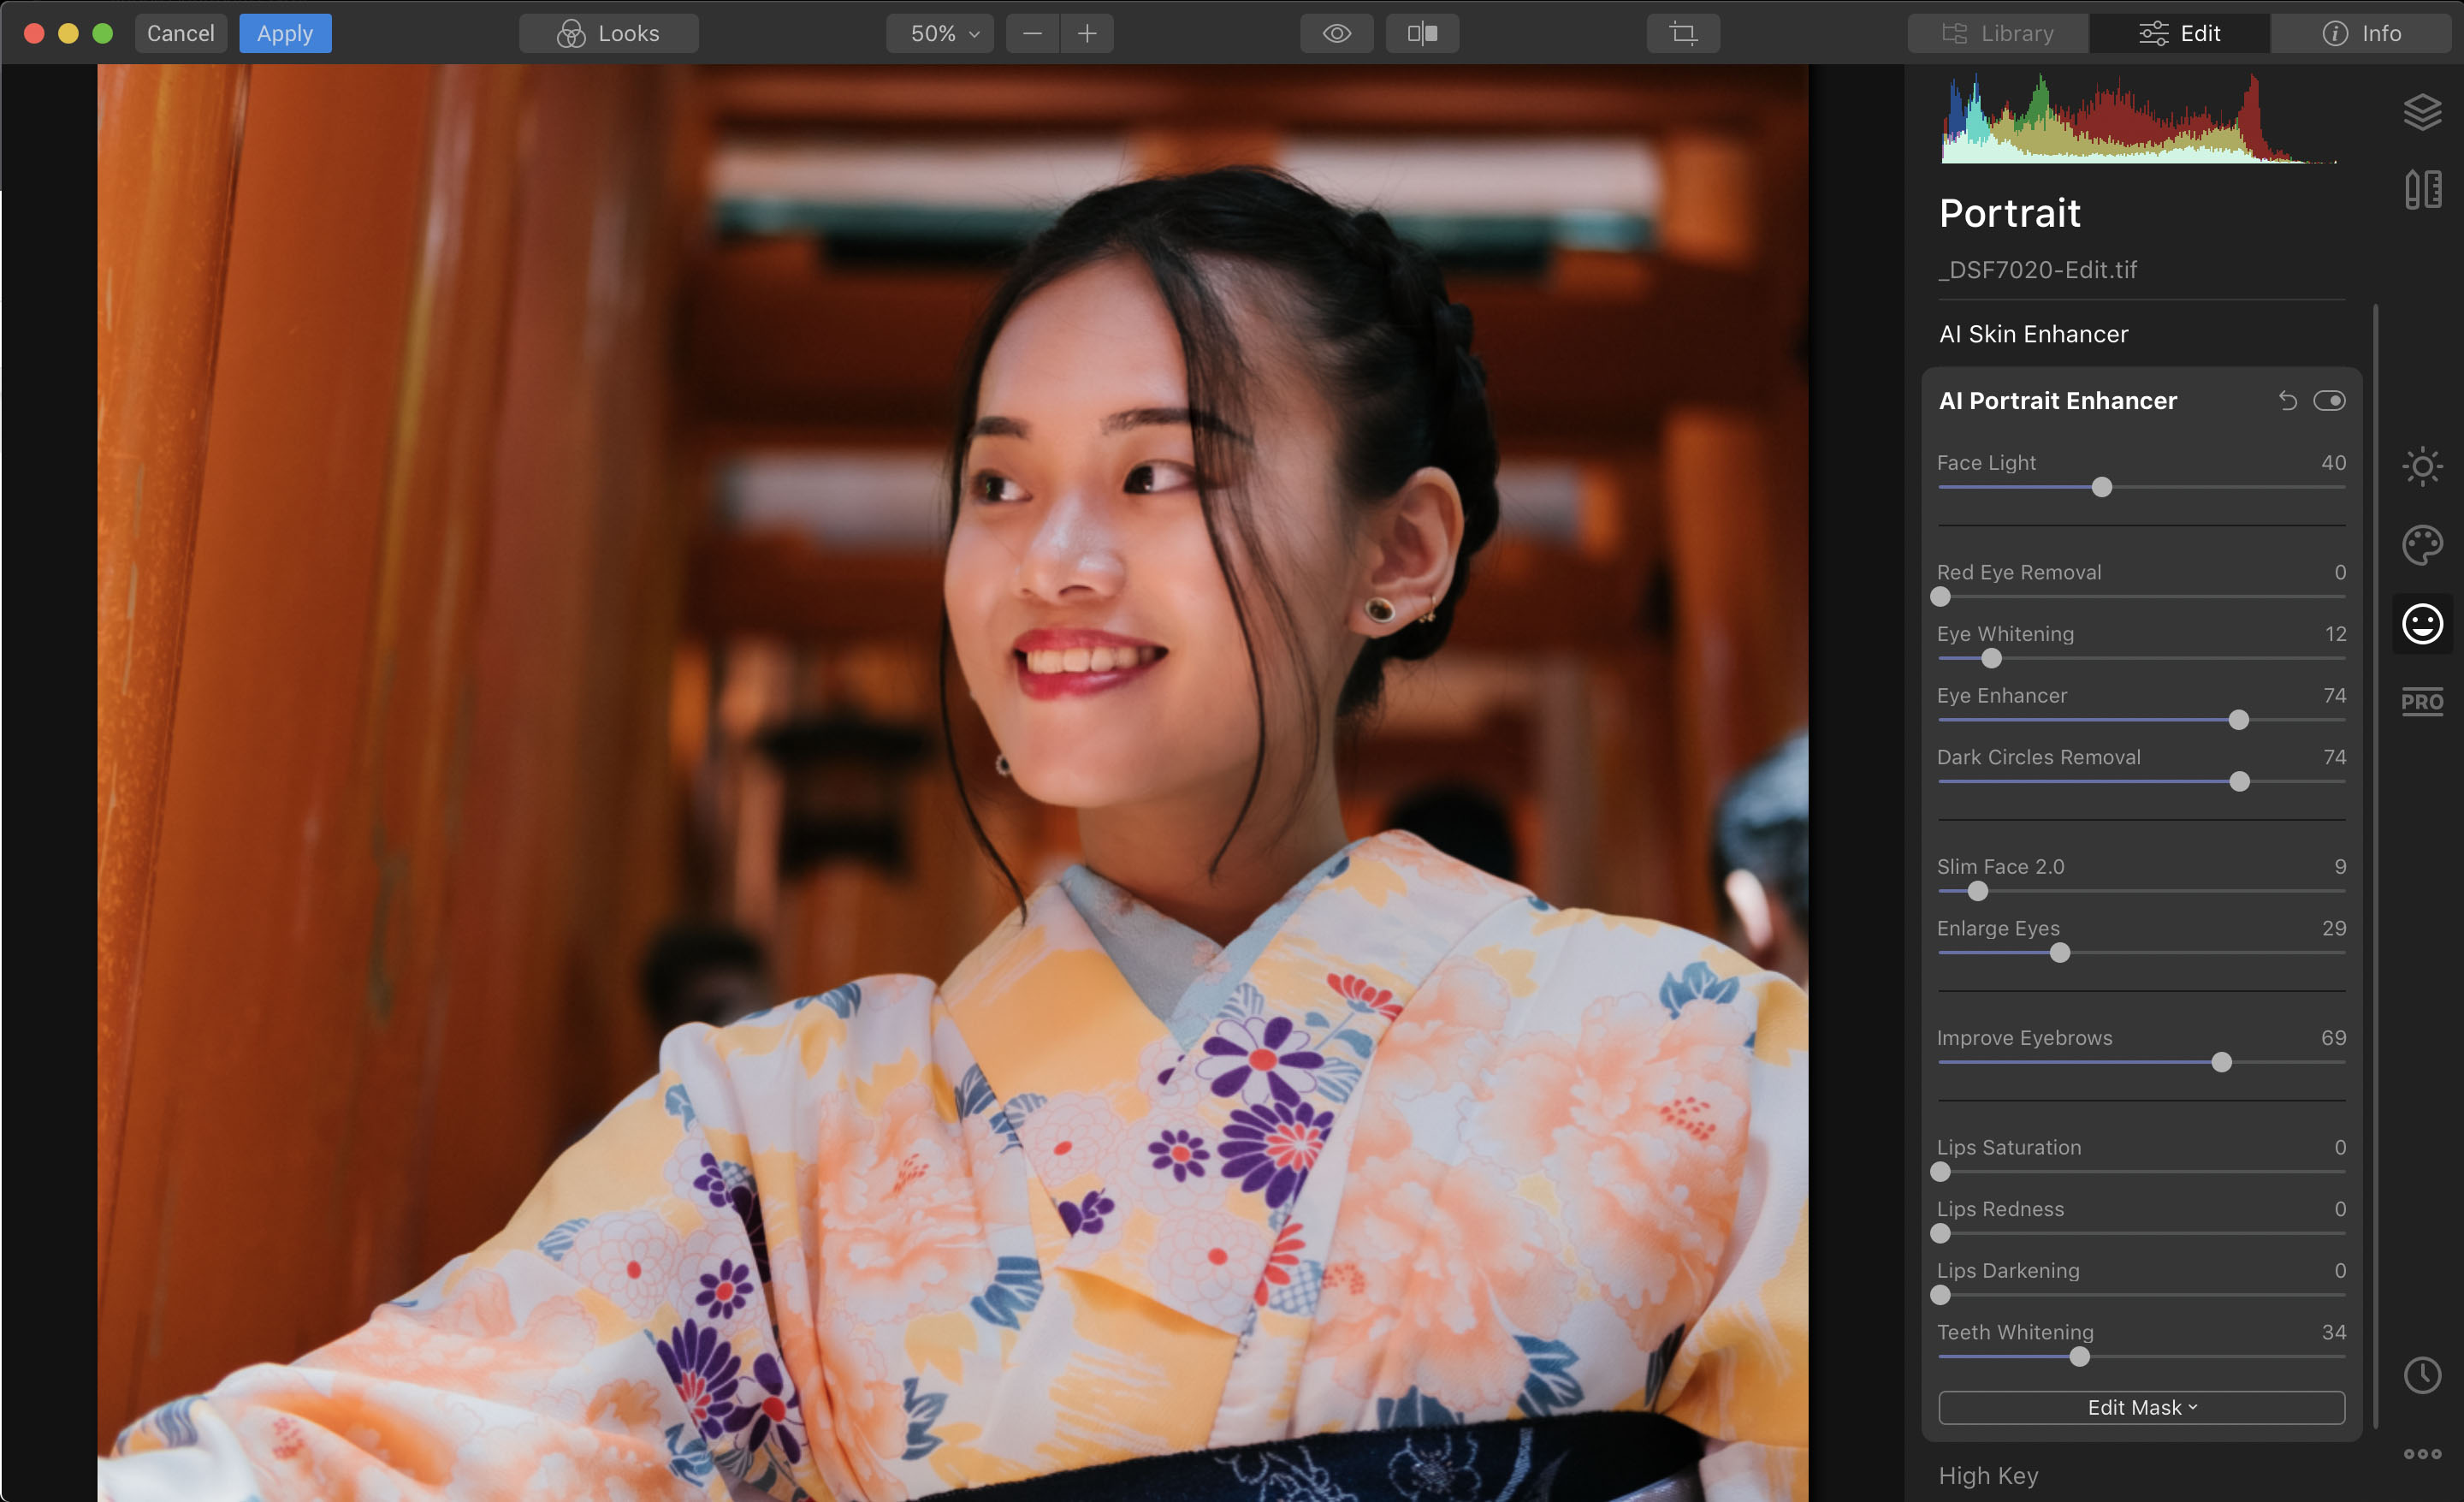
All these adjustments are done automatically. The face is recognized, and skin is intelligently retouched, saving precious hours with every photo session. Now, we go to another tool, AI Portrait Enhancer, which allows us to make extraordinary portraits in seconds.
The tools here are self-explanatory, so I complete these adjustments quickly to my taste. Face Light (+40), Eye Whitening (+12), Eye Enhancer (+74), Dark Circles Removal (+74), Slim Face 2.0 (+9), Enlarge Eyes (+29), Improve Eyebrows (+69), and Teeth Whitening (+34). You will note a drastic improvement, especially as you zoom in to 100% or 200%. What’s more, these tools are very easy to use and don’t require layers, masks, or complicated steps to follow.
Beat the clock
Now, this is where we can apply our secret weapon. Click on “Looks” on the top, and click “Save New Look”. It will create a preset with all your smart adjustments, so whenever you need to replicate these adjustments whenever you need to edit another shot from the same or different series to quickly replicate the results, just click on that look to apply all the settings.
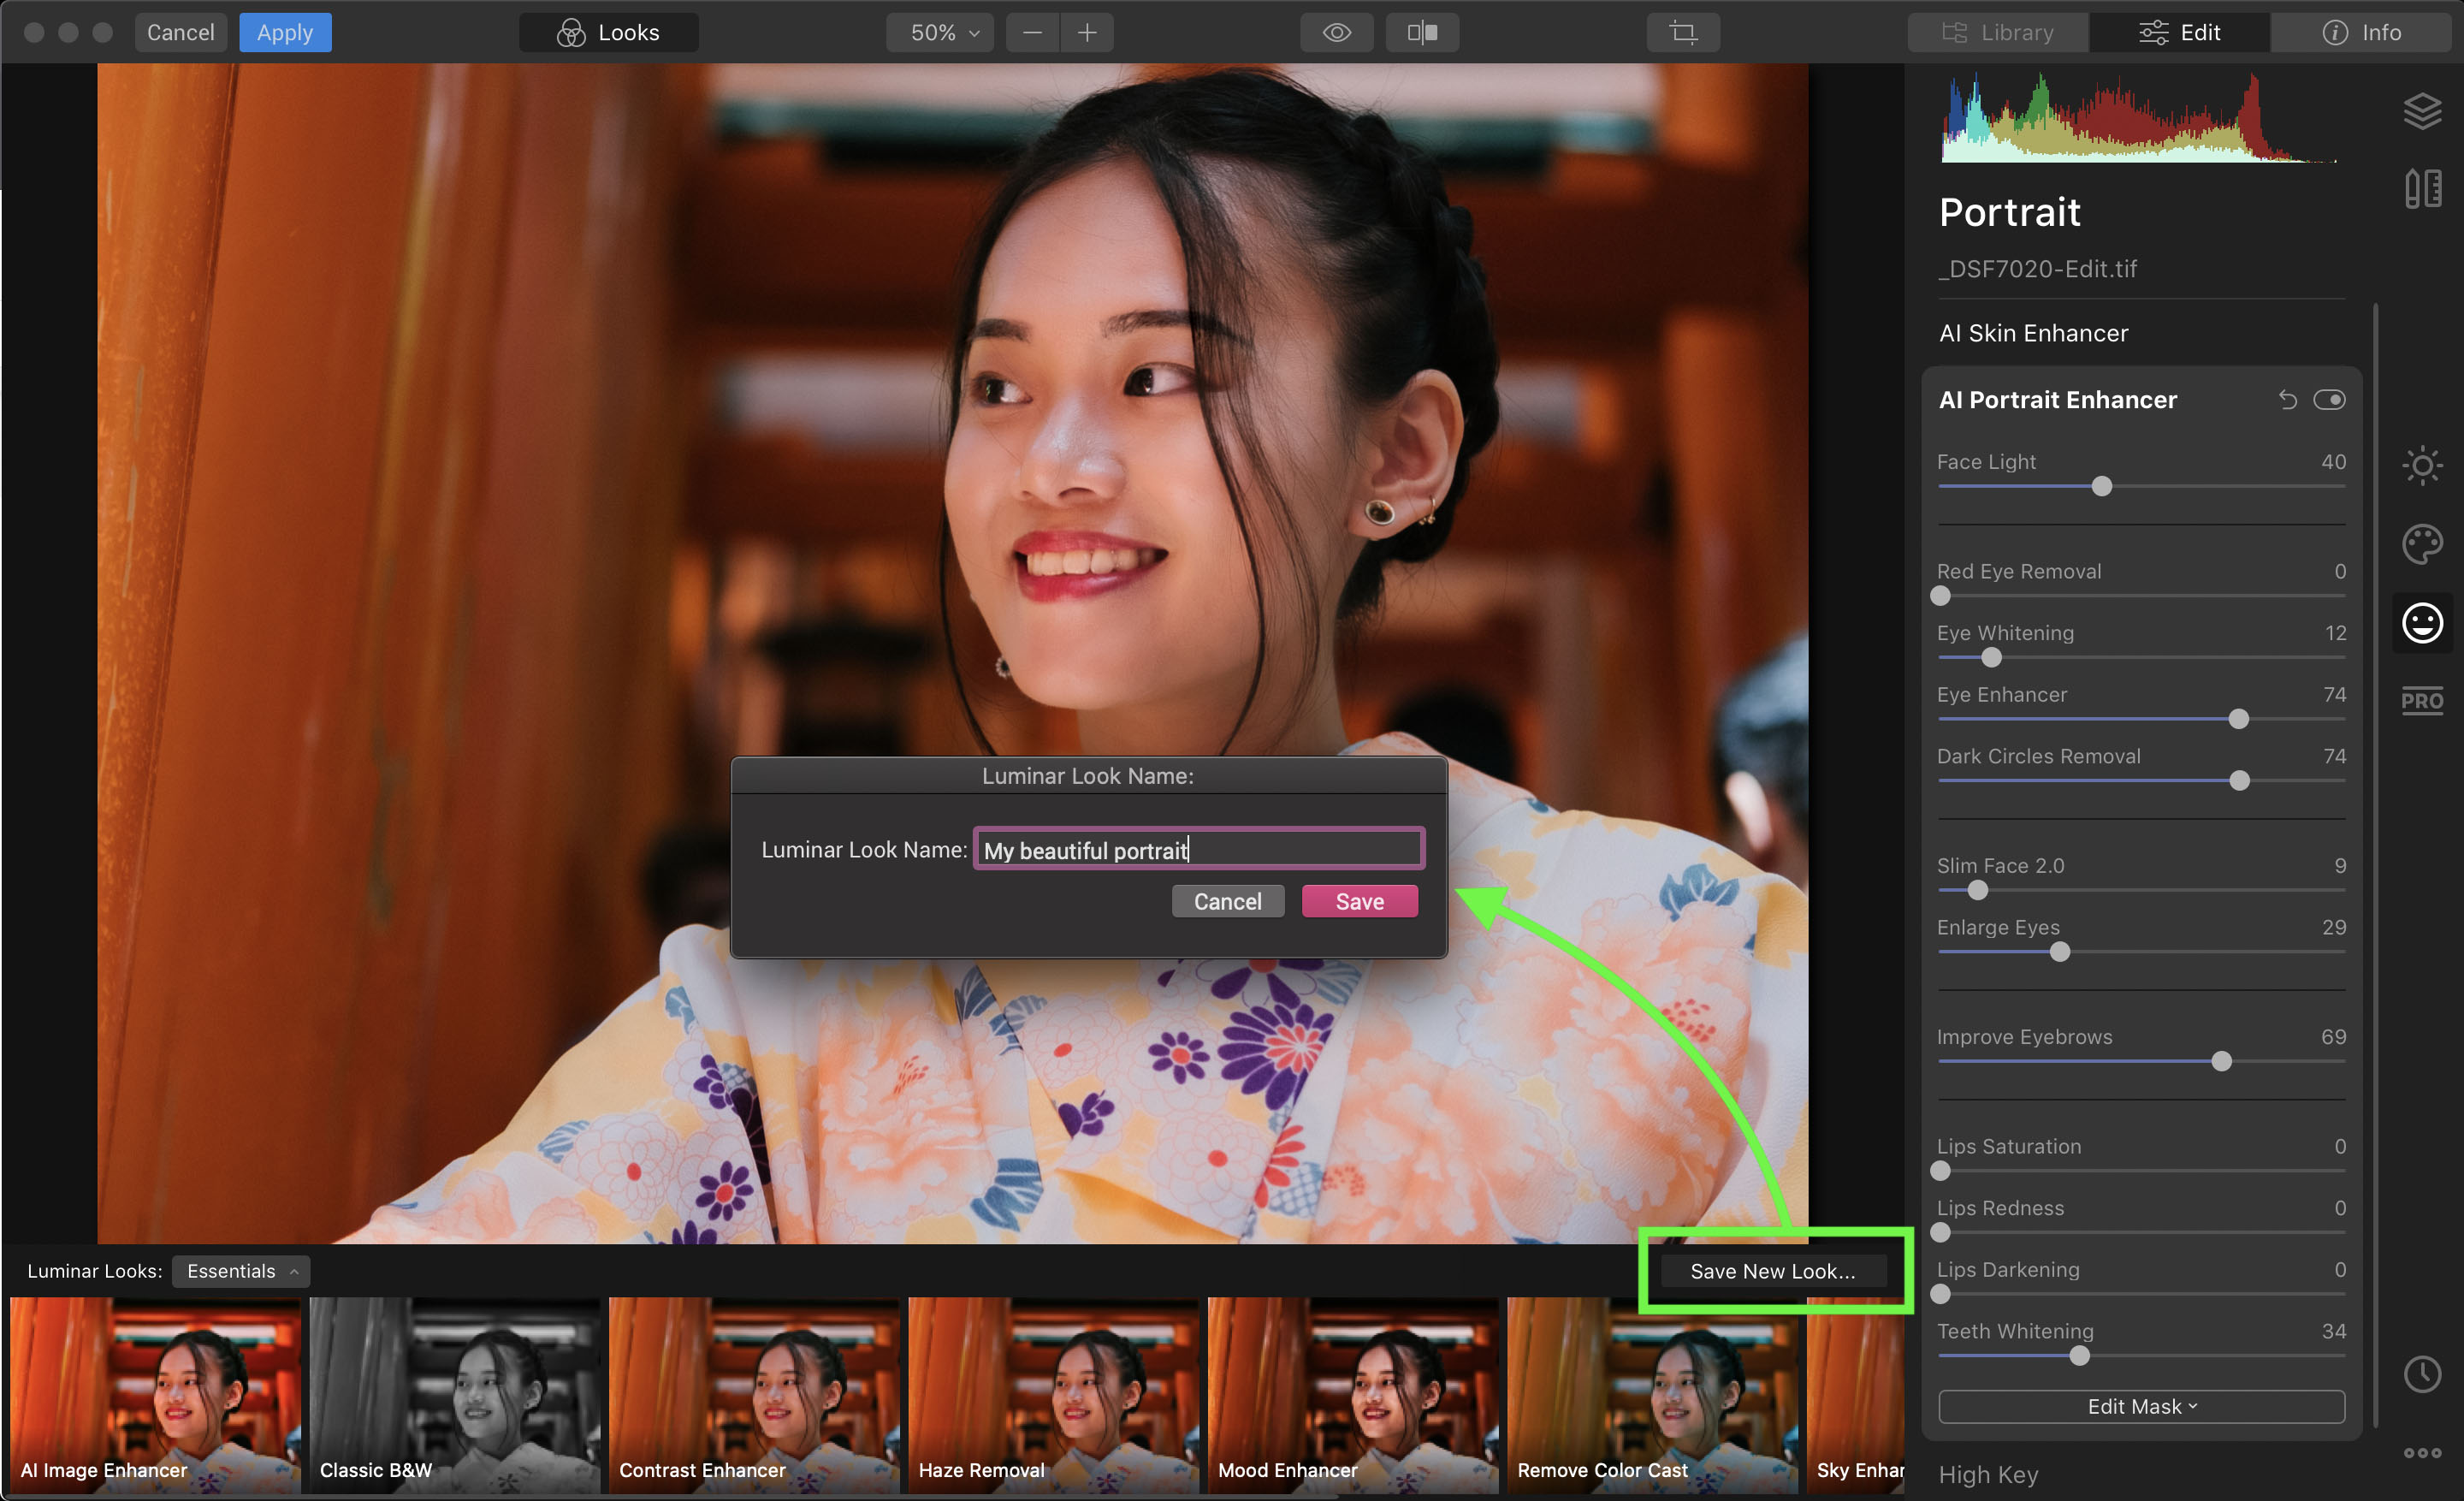
Now that we are done, click “Apply” on top left to bring you back to Lightroom. Of course, we can do the same directly from Luminar and make these basic adjustments there, or even dive into more advanced options, such as layers and masks to make precise adjustments. That’s all you need to get started.

Side-by-side comparison of the AI Skin Enhancer and AI Portrait Enhancer changes between Lightroom and Luminar.

Progression from original RAW file to Lightroom edit to Luminar AI enhancements.
500px and Luminar have partnered to bring you a Quest! We want to see your best photo edits—composites, landscapes, studio shots, the possibilities are endless just show us your artistic abilities at work. Enter the Quest here.
