Contents
Mastering Food Photography Lighting
Nailing the right light can make your food pics go from “meh” to drool-worthy. Here, we’re gonna chat about ring lights and other lighting options to step up your food photography game.
Understanding Ring Lights
Once upon a time, ring lights were just for dentists checking your pearly whites or docs doing…doctor stuff. Now, photographers love them because they give a nice, even glow without any pesky shadows (Luvos Store). They’re perfect for those detail-packed shots of things like soups, shiny glasses, and reflection-heavy stuff.
The magic of ring lights is that they wrap your dish in soft, gentle light, making your ingredients look tasty and tempting. If you’re snapping close-ups, these are your go-to for really making your food pop to capture all the juicy details. For a closer look at how this really works, check out our piece on how food photography looks with ring lighting.
Ring lights have some sweet benefits:
- Shadow-Free Zone: Kiss those harsh shadows goodbye; your pics will look super slick.
- Texture & Detail Love: Brings out those little details that make dishes mouthwatering.
- Shiny Object Specialist: Makes glass and shiny things sparkle like a gem.
Alternatives to Ring Lights
Don’t think ring lights are the only game in town. There’s a bunch of other lighting setups that might suit you better depending on your photo style or scene. Let’s explore some options:
- Softbox Lighting:
- Pros: Gives off a big, soft blanket of light—gentle yet powerful.
- Best For: Those wide, inviting shots and keeping things natural.
- Peep This: Take a look at how food photography looks with softbox lighting.
- LED Panels:
- Pros: Brightness and color controls for days, perfect for getting the mood just right.
- Best For: Crafting your ideal lighting and keeping it consistent.
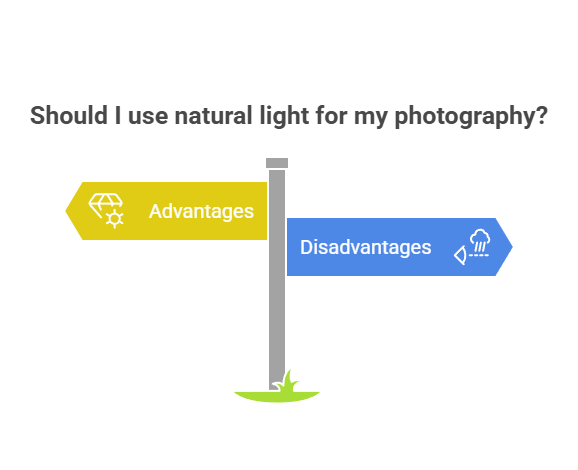
- Natural Light:
- Pros: It’s free and perfect for the natural vibe.
- Challenges: Totally at the mercy of the weather and time.
- Think About: Check out the battle between natural vs artificial lighting.
- Speedlights and Flashes:
- Pros: These are the portable powerhouses; can catch motion in action.
- Best For: Freezing motion and honing in on specific details.
Here’s a quick rundown to see which lighting fits your style best:
| Lighting Type | Pros | Best For |
|---|---|---|
| Ring Light | Shadow-free, detail lover | Close-ups, macro snapshots |
| Softbox | Light blanket, gentle touch | Wider, more natural shots |
| LED Panels | Control freak’s dream | Custom and consistent lighting |
| Natural Light | Freebie, down-to-earth | Depends on the day’s mood |
| Speedlights | Portables, detail snipers | Action shots, specifics |
Want the full scoop on how different lighting can change your photos? Check out our guide on how food photography looks with different types of lighting.
When you get the hang of these lighting tricks, your food pics will be absolute show-stoppers for any special event or occasion—Bon Appétit!
Ring Lights for Food Photography

Ring lights are the unsung heroes of food photography, turning your culinary creations into visual masterpieces with their knack for even lighting. Here, we’re diving into why ring lights are great for snapping those drool-worthy shots and what you might want to watch out for.
Advantages of Ring Lights
Why do food photographers swear by ring lights? Let’s break it down:
- Shadow-Free Magic: When you’re grinding out a killer food photo, nothing kills the vibe like a pesky shadow. Ring lights say, “Not today!” They banish shadows lurking from your camera, giving your food that clean, professional look. Pretty sweet, huh? (Luvos Store)
- Even Steven Lighting: For all the reflective bits, like a swig of soup or a glass of bubbly, these lights are pros at making everything shiny and bright without the hassle. They hit those right spots that make your photos pop right off the page (Bootstrapped Ventures).
- Highlight the Good Stuff: Whether you’re getting close and personal with a slice of cake or want to show off your grandma’s lasagna, ring lights make sure every detail shines. They’re fabulous at bringing out the best in every ingredient (Offshore Clipping).
- The Switcharoo Power: Another cool thing? You can use them as a steady light or switch to flash. It’s like having a photography Swiss Army knife, perfect for outside shots when the sun isn’t playing nice.
No wonder they’re on every food photographer’s wishlist.
Limitations of Ring Lights
But hey, like that perfect pastry, ring lights ain’t flawless. Here’s the scoop on their drawbacks:
- Not the One-Size-Fits-All: Sure, ring lights ace close-ups, but throw them in with bigger scenes, and they’re scratching their heads. If there’s a wide spread to showcase, they might not hit the mark (Replica Surfaces).
- Flat Look Alert: Sometimes all that uniform light can make your photo look, well, flat as a pancake. And not the fluffy type. You miss the play of shadows that gives photos more oomph.
- Too Much of a Good Thing?: Beware the glare! Ring lights love a shiny subject, maybe a little too much, leading to a bit too much bling for comfort (Bootstrapped Ventures).
The trick is to try out different angles and setups to balance things out. And for even more pointers on this light game, take a peek at our advice on rocking that ring lighting in food photography.
Once you get the hang of the good and the not-so-good, you can crank your food photography up a notch. Get savvy with lighting tips in our annotation photography food corner and make those dishes shine.
Enhancing Food Photography Lighting
Lights are the secret sauce that transforms your food photos from ‘meh’ to ‘yum!’ Using a ring light can seriously up your game. Knowing how to place and use these lights can make your pictures scream delicious. Let’s uncover a few cool lighting tricks with ring lights and the magic of three-point lighting.
Experimenting with Ring Light Placement
Playing around with where you put your ring light can lead to some eye-catching effects. Check these out:
- Front Placement: Stick that ring light right in front of your food. Bam! You get a nice even glow that wipes out shadows and highlights all those mouth-watering details. Perfect for snapping textures and designs on your dishes.
- Side Placement: Move your light to the side, and voilà, you get a soft, natural shadow just like sitting by a sunny window. It tones down harsh glare and gives your photo some beautiful depth.
- Top Placement: Hang the light overhead, and you’ll spotlight the top layer. Great for that flat-lay Insta shot that everyone drools over.
- Low Angle: Set the light low to mix in some drama with shadows. It’s your go-to for a mysterious, artistic look.
Need more tips and a closer look? Pop over to our article on how food photography looks with ring lighting.
| Placement | What It Does |
|---|---|
| Front | Smooth light, no shadows |
| Side | Soft shadows, extra depth |
| Top | Highlights surface, awesome for overheads |
| Low Angle | Dramatic vibes with shadows |
For smoother lighting, try throwing a veil or some cloth over the ring light. If you’re hankering for more creative ideas, our food photography ideas for fall will satisfy your cravings.
Utilizing Three-Point Lighting
Three-point lighting is an all-time favorite for bringing photos to life. Here’s what you need:
- Key Light: This is your main light, where all the magic happens. A ring light can be your key light, tucked on one side of your dish.
- Fill Light: This one chills on the opposite end of the key light, evening out those shadows. A soft box or another light with a diffuser works wonders here.
- Back Light: The cherry on top! Behind your food, it pops your subject off the background, giving it that wow factor.
Want to geek out more on lighting setups? Check out how food photography looks with different types of lighting.
| Light Type | What It’s For | Best Gear |
|---|---|---|
| Key Light | Shine and spotlight | Ring Light |
| Fill Light | Smoothing shadows | Softbox/Other Diffused Light |
| Back Light | Background pop | Small LED or Ring Light |
Mixing a ring light with the three-point technique can seriously elevate your food photos. Perfect for snapping those intricate dishes or colorful spreads like you might find on a charcuterie board.
Try out these lighting styles, and watch your food photos turn into mouth-watering masterpieces!
Artificial Lighting in Food Photography
In food photography, lights are your best buddy, making sure every photo is spot on, every time. So, whether you’re snapping pics for Grandma’s recipe book or getting ready for a big event like a wedding cake shoot, nailing your lighting game is key to some drool-worthy pics.
Types of Artificial Lights
You’ve got three main players in the food photo light game: Speed Lights, Continuous Lights, and Strobes. Each one brings something different to the table. Let’s break it down:
| Type of Light | Description | Perks | Heads Up |
|---|---|---|---|
| Speed Lights | Fast-moving, off-camera flashes | Easy to carry, easy to set up | Not as strong as strobes (Regan Baroni) |
| Continuous Lights | Always-on lights | See the lighting effect instantly, ideal for newbies | Can get hot, need more juice |
| Strobes | Mighty off-camera flashes | Big power, precise control, perfect for pros | Takes a bit more know-how (Regan Baroni) |
Still curious about how different lights make your food photos pop? Check out our articles on how food photography looks with different types of lighting and how food photography looks with ring lighting.
Essential Equipment for Artificial Lighting
Getting your food photo rig just right means having some must-have gear. What you need depends on your light choice and how you want your pics to turn out.
- Light Stand: It’s like a rock, but for your lighting gear.
- Speed Ring or Mount: The thingamajig that hooks up your light tricks to the main light.
- Light Modifiers: Think umbrellas, softboxes, reflectors, and diffusers. Softboxes give that warm fuzzy glow, while diffusers ease up on the brightness. Reflectors? They’re like a surprise party for shadows, bouncing light around.
- Wireless Trigger: It’s the walkie-talkie between your camera and the light, especially with speed lights and strobes.
Want to step up your lighting game with more cool tips? Check out our pieces on how food photography looks with softbox lighting and food photography on charcuterie board.
Buy some quality gear and figure out how to tweak it just right, and you’ll be the king or queen of food pics in no time. Each piece matters when you’re all about getting that perfect snap. Hungry for more ideas? Peek into our articles on food photography ideas cheese and food desert photography ideas.
Tips for Making Your Food Photos Shine
Capturing the deliciousness of food in a picture depends a lot on lighting. A great lighting setup can showcase the textures, colors, and mouthwatering allure of your dish. Let’s jump into some handy ways to control light, plus the magic of reflectors and diffusers, to get your snaps looking top-notch.
Twisting and Turning the Light
How you tweak lighting does wonders for altering the vibe and feel in food photos. Check out some cool tricks to try:
Distance Dance: Scoot the light source closer to the food for more punchy and focused highlights, or back it up for a softer, dreamy glow. This is gold for when you’re going for that just-right, natural vibe. Think of it as a spotlight from afar or the cozy warmth of the sun peeking through a window.
Triple Threat Lighting: Combine a ring light with a couple more lights for extra oomph in your food pics. This setup rocks when your scene has multiple bits and bobs that need some spotlight and sparkle.
Shadow Play with Flags: Whip out flags or black cards to cast striking shadows or highlight features. If you want to add some mood or drama to your images, this trick turns a simple dish into an artistic story.
Here’s a quick look at these methods:
| Technique | Effect | Perfect For |
|---|---|---|
| Distance Dance | Intensity control and light softness | Everyday food shots |
| Triple Threat Lighting | Boosts depth and sharpness | Busy and detailed scenes |
| Shadow Play with Flags | Dramatic highlights and shadows | Moody and artistic scenes |
Wanna see how these tricks change your photos? Check out how different lighting impacts food photography.
Reflect and Soften with Style
Reflectors and diffusers are your best pals for lighting control, helping you smooth and balance shadows for those drool-worthy food shots.
Reflectors: They bounce light back at your dish, helping erase those pesky shadows and even out the brightness. Use them to highlight those tiny, tasty details.
Diffusers: These guys soften the light, dialing down the harsh glare to craft a smooth, natural look. Throw a big diffuser into the mix for a polished lighting effect.
Peek at how these tools work their magic:
| Tool | Superpowers | Quick Tip |
|---|---|---|
| Reflectors | Shadow-busting, adds shine | Pop it across from your main light to reflect light onto the food. |
| Diffusers | Light softening, smooth effects | Slide it between your lamp and the dish to spread out the light. |
Pairing these with some ring light savvy can really ramp up your food shots.
For extra inspiration, have a browse through our tips on creating charcuterie board masterpieces or autumn-themed food photo ideas. These guides are loaded with nuggets that’ll help elevate your pics to a professional level.
Crafting the Perfect Lighting Setup
Nailing the right lighting can make your food pics pop like grandma’s biscuits on Thanksgiving. Wrap your head around using natural and fake lighting, and getting the hang of soft light and where it shines from. This can work wonders for those scrumptious shots.
Natural vs Artificial Lighting
Knowing the deal between sunlight and man-made light is a game-changer for taking pictures of grub. Sunlight gives that warm, cozy vibe that everyone loves in food photos, but let’s be real, it can be as dependable as a teenage curfew (Two Loves Studio).
Natural Light

Winning Points:
- Serves up a soft, pretty glow
- Gives you cool shadows and highlights
- No fancy gadgets required
Bummers:
- Out of control and all over the place
- Limited depending on Mother Nature’s mood
The no-fuss way to use sunlight? Stick your setup by a window with light coming in from the side. A sheer curtain or thin cloth can do wonders by softening the light, while grabbing a white board or a relector to keep shadows in check (Two Loves Studio).
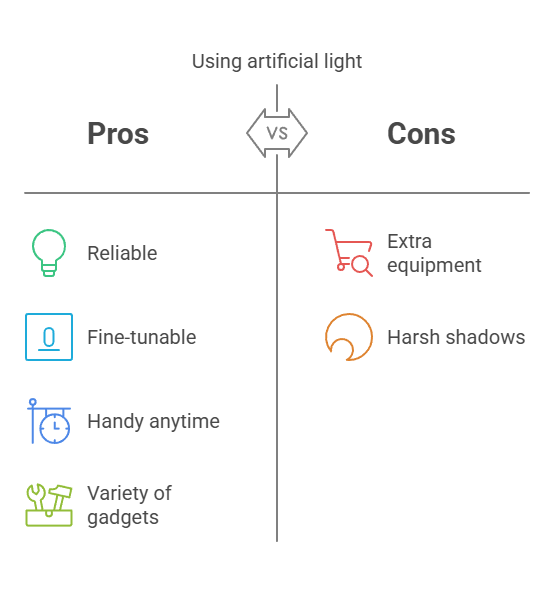
Artificial Light
Using fake lights like lamps or flashes keeps everything under your thumb. Great for those cloudy days or night owls needing to snap pics after sundown (Regan Baroni).

You’ll need some basics:
- Light stands
- Mounts or connectors for gadgets
- Gadgets like umbrellas or softboxes
- Wireless stuff to set off your lights
Peep how different lights change the look of food shots over at how food photography looks with different types of lighting.
Soft Light and Light Directions
Smooth and gentle light is a not-so-secret sauce for drool-worthy food photos. It makes sure shadowy spots aren’t too harsh. Where the light hits also helps set the scene and feel of the photo.
Soft Light
To nail it, use these handy tools:
- Diffusers: Pop these between the light and what you’re shooting to soften it like a cushion.
- Reflectors: These bounce light back, filling in those shadowy parts and giving a little extra flair.
Things around the house like white foam boards do the trick. Check out our guide on softbox lighting effects for deeper dives.
Light Directions
Playing with where the light’s coming from can jazz up your food photos big time:
- Side Lighting: Makes textures pop, showing off all the yummy details.
- Back Lighting: Throws in drama, showing off the food’s shape.
- Front Lighting: Chases away shadows, making things look clean and crisp.
Knowing how to control light direction can take your food snaps from “meh” to “wow.” Dive into annotation photography food for more juicy insights.
Once you’ve got a grip on these lighting tricks and know when to grab sunlight or reach for a lamp, you’ll have the keys to the perfect setup. Play around and watch how light dances with your dishes for those jaw-dropping results.
