Capturing the sleek curves and raw power of vehicles requires more than just passion—it demands technical mastery. Whether you’re snapping shots at a car show or freezing motion on a racetrack, the right setup transforms ordinary photos into gallery-worthy art. This guide unlocks the secrets to balancing creativity with precision, no matter your skill level.
From golden-hour glow to indoor studio lighting, every scenario demands unique adjustments. We’ll explore how aperture choices highlight chrome details and why shutter speed dictates whether wheels look parked or in motion. Real-world examples from industry experts simplify complex concepts, helping you avoid common pitfalls.
Why does this matter? Proper configurations preserve a vehicle’s personality while adding your artistic flair. You’ll learn to adapt to challenges like low-light conditions or reflective surfaces, ensuring every shot tells a compelling story. Let’s shift gears from guesswork to intentional, professional-grade results.
Contents
- 1 Understanding the Exposure Triangle for Car Photography
- 2 Best Camera Settings for Car Photography
- 3 Static Car Photography: Enhancing Detail and Depth
- 4 Motion Car Photography: Techniques for Capturing Movement
- 5 Daytime vs. Night Car Photography Settings
- 6 Indoor and Outdoor Car Photography: Lighting & Environment
- 7 Camera Equipment Essentials for Car Photography
- 8 Creative Composition and Angles in Car Photography
- 9 Post-Processing Tips for Car Photography Perfection
- 10 Avoiding Common Pitfalls in Car Photography Settings
- 11 Conclusion
- 12 Frequently Asked Questions
- 12.1 How do I balance ISO, aperture, and shutter speed for moving vehicles?
- 12.2 What’s the ideal depth of field for static car shots?
- 12.3 How can I avoid blurry images when shooting cars in motion?
- 12.4 What settings work best for night car photography?
- 12.5 How do I reduce glare on a car’s surface during daytime shoots?
- 12.6 What lens is recommended for capturing unique angles?
- 12.7 How important is white balance in post-processing?
- 12.8 Can I shoot cars indoors without professional studio lighting?
Key Takeaways
- Technical adjustments elevate both static and action shots
- Lighting conditions dramatically impact setup requirements
- Expert-recommended approaches prevent overexposure/blur
- Creative freedom grows with foundational knowledge
- Adaptable strategies work for hobbyists and pros alike
Understanding the Exposure Triangle for Car Photography
Think of the exposure triangle as three teammates working together to nail your shot. ISO, shutter speed, and aperture each play distinct roles in controlling light and sharpness. Get their balance right, and you’ll turn metallic finishes into liquid mercury while keeping spinning wheels crisp.
ISO, Shutter Speed, and Aperture Basics
ISO determines your sensor’s light sensitivity. Lower values (like 100) work best in daylight, reducing grain. Bump it up in garages or twilight shoots—just watch for noise in shadows.
Shutter speed freezes or blurs motion. Use 1/500s or faster to capture tires mid-rotation at races. Slow it to 1/60s for artistic light trails behind cruising classics.
Aperture (f-stop) controls depth. Wide openings (f/2.8) isolate hood ornaments against creamy backgrounds. Narrow ones (f/11) keep entire car shows in focus from bumper to bumper.
Balancing Settings for Different Lighting Conditions
Bright sun? Start with ISO 100, f/8 aperture, then adjust shutter speed. Shooting at dusk? Try ISO 800 with f/4 and stabilize your camera. Auto white balance handles mixed lighting—like neon signs reflecting on polished fenders.
Your sensor’s size affects low-light performance. Full-frame models handle high ISO better than crop sensors. For indoor showcases, pair slower shutter speeds with tripods to avoid blur from artificial lights.
Remember: slight overexposure preserves shadow details in post-processing. Check your histogram—peaks should lean right without clipping highlights on chrome trim.
Best Camera Settings for Car Photography
Getting razor-sharp vehicle shots starts with three core adjustments. Professional shooters recommend these starting points:
- Static daytime shots: ISO 100-200 | f/8-f/11 | 1/250s shutter
- Moving subjects: ISO 400-800 | f/4-f/5.6 | 1/1000s+ shutter
- Low-light interiors: ISO 1600 | f/2.8 | 1/60s (with stabilization)
Wider apertures (like f/2.8) make headlights pop against soft backgrounds, while f/11 keeps entire dealership rows crisp. “Shooting at f/8 gives me flexibility in mixed lighting,” notes automotive photographer Lena Torres. “It maintains detail without sacrificing bokeh potential.”
For rolling shots, prioritize shutter speed over other elements. A 1/1000s freeze-frame captures tire tread patterns mid-spin, while 1/125s panning shots create speed-blurred backgrounds. Always use continuous autofocus modes when tracking moving vehicles.
| Scenario | Priority Setting | Pro Tip |
|---|---|---|
| Showroom displays | Aperture | Use f/16 for reflections in chrome trim |
| Race track action | Shutter speed | 1/2000s stops tire lettering rotation |
| Sunset cruises | ISO | Limit to 800 to preserve gradient skies |
Modern mirrorless systems handle high ISO better than older DSLRs. When editing, slightly underexposed RAWs retain more highlight detail than jpegs. Always shoot in manual mode for full creative control over metallic finishes and glass reflections.
Static Car Photography: Enhancing Detail and Depth
Static shots turn vehicles into timeless sculptures when executed with precision. Mastering depth of field and sensor sensitivity separates amateur snaps from polished portfolio pieces. Let’s explore how to make every curve and chrome accent pop.
Controlling Depth of Field with Aperture
Wider apertures (f/2.8-f/4) soften backgrounds, directing attention to hood ornaments or custom wheels. For vintage cars at shows, this technique minimizes crowd distractions. Try f/8 when capturing entire vehicles – it keeps bumper-to-trunk details sharp while gently blurring distant trees or buildings.
Narrower f-stops like f/11 shine in dealership shots. They maintain focus across multiple cars without losing texture in pavement or showroom signage. “An f/16 aperture captures reflections in polished doors like liquid metal,” says pro shooter Marco Velez.
Optimizing ISO for Clear, Sharp Images
Low ISO values (100-400) preserve crisp lines in daylight. They prevent grain from muddying intricate grille patterns or tire treads. In shaded areas, bump to ISO 640 – but watch for noise in wheel wells or undercarriage shadows.
Use this cheat sheet for common scenarios:
- Sunny exterior: ISO 100 + f/8
- Overcast detail shots: ISO 200 + f/5.6
- Garage interiors: ISO 800 + tripod
Remember: Clean files from low ISO allow aggressive cropping in post. Pair these settings with manual focus peaking to highlight pinstriping or badge engravings.
Motion Car Photography: Techniques for Capturing Movement
Action shots turn roaring engines into visual poetry when you master movement dynamics. Timing becomes your paintbrush, and shutter adjustments your palette. Let’s explore how to transform blurry disappointments into adrenaline-packed frames.
Freeze Time With Lightning-Fast Shutter Speeds
1/1000s or faster stops spinning wheels mid-rotation, preserving tread patterns and brake caliper details. This works for racetrack sprints or drifting cars kicking up dust. Keep ISO under 800 to avoid noise in shadowy wheel wells.
Panning: Where Precision Meets Motion
Track vehicles sideways using 1/60s-1/125s speeds. The trick? Rotate your hips like a turret, matching the auto’s velocity. “Practice on bicycles first,” suggests motorsport photographer Eli Ramirez. “Smooth rotation creates buttery backgrounds while keeping the subject sharp.”
| Scenario | Shutter Speed | Pro Tip |
|---|---|---|
| Highway speed | 1/2000s | Freezes license plates at 70mph |
| Urban drifting | 1/125s | Adds tire smoke texture |
| Rolling shots | 1/60s | Use tripod for side-mounted cameras |
Start with burst mode and continuous AF. Anticipate curves where cars slow slightly – bridges and hairpin turns offer perfect speed harmony. Underexpose by 0.3 stops to retain highlight details in chrome accents.
Vary your approach. Faster speeds isolate mechanical details, while slower ones convey raw energy. Every failed shot teaches timing nuances. Soon, you’ll instinctively know when to click for that split-second wheel alignment or exhaust flame burst.
Daytime vs. Night Car Photography Settings
Sunlight and streetlights demand completely different strategies when framing automotive subjects. The transition between these environments challenges photographers to rethink exposure, composition, and equipment choices.
Managing Exposure in Bright Conditions
Harsh sunlight creates intense reflections on windshields and metallic paint. Dial exposure compensation down by -0.7 stops to preserve detail in chrome accents. Use a circular polarizer to cut glare while maintaining rich sky colors.
Midday shoots benefit from lower ISO (100-200) and faster shutter speeds (1/500s). For side-lit vehicles during golden hour, try f/8 with spot metering on the hood. This balances shadow depth with highlight retention.
Long Exposures and Low ISO for Night Shots
Cityscapes behind parked vehicles come alive with 30-second exposures at ISO 100. Stabilize your gear on a tripod and trigger remotely to avoid vibrations. Capture light trails from passing traffic by shooting at f/11 with a 10-second shutter.
Mixed artificial lighting requires custom white balance. Snap a reference photo of a gray card under the existing lights. “Night photography thrives on contrast,” explains urban shooter Dana Kim. “Position cars near neon signs to create colorful reflections in the bodywork.”
Essential adjustments for varied conditions:
- Daytime highlights: Expose for the brightest area, recover shadows in post
- Twilight transitions: Bracket exposures to blend later
- Urban nights: Use streetlamps as rim lights
Experiment with light painting using LED strips to outline vehicle contours. Always review histograms – clustered shadows indicate underexposure, while spiked highlights mean lost detail. The magic happens when technical control meets creative vision.
Indoor and Outdoor Car Photography: Lighting & Environment
Lighting transforms ordinary vehicles into cinematic subjects, whether you’re in a sterile studio or under open skies. Controlled environments offer precision, while natural settings provide organic drama—each requiring distinct approaches to showcase automotive character.

Mastering Studio Illumination
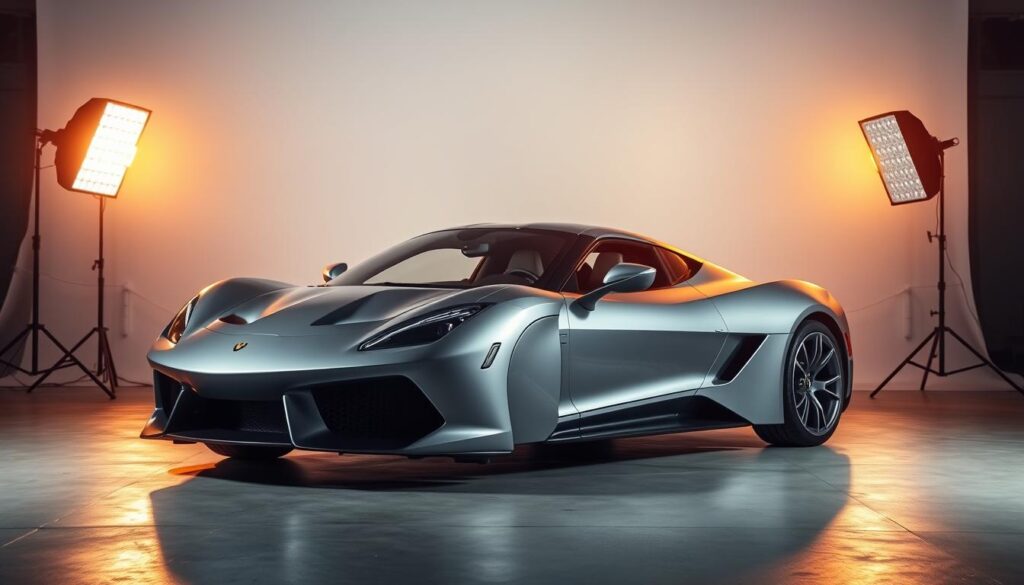
Softboxes positioned at 45-degree angles eliminate harsh reflections on glossy paint. Use strip lights to accent body lines and rim lights to separate vehicles from dark backdrops. Key tip: Bounce flash off ceilings for even distribution across matte finishes.
Harnessing Natural Light Outdoors
Golden hour casts warm tones that enhance metallic flecks in paint jobs. Overcast days? Perfect for minimizing shadows on white vehicles. Position subjects so the sun grazes surfaces diagonally—this reveals texture without blowing out highlights.
| Scenario | Lighting Tool | Lens Pairing |
|---|---|---|
| Studio Detail Shots | Ring Light | 50mm Prime |
| Urban Night Shoots | LED Panels | 24-70mm Zoom |
| Countryside Drives | Reflectors | 16-35mm Wide |
Prime lenses like the 85mm f/1.8 isolate hood ornaments against creamy bokeh, while wide-angle zooms capture environments without distortion. “A polarizing filter becomes your best friend outdoors,” notes commercial photographer Alicia Nguyen. “It cuts windshield glare while deepening sky blues.”
Embrace environmental storytelling: rain-slicked streets mirror tail lights, while desert dust adds grit to off-roaders. Test backlighting through sunroofs or use neon signs to paint urban cars with electric hues. Every location whispers its own visual narrative—your job is to amplify it.
Camera Equipment Essentials for Car Photography
Professional automotive imagery demands tools that transform technical challenges into creative triumphs. The right gear elevates texture reproduction, controls reflections, and captures velocity with precision. Let’s explore how strategic equipment choices impact both technical execution and artistic impact.
Mirrorless systems lead in versatility, offering real-time exposure previews and rapid autofocus. Prioritize bodies with weather sealing for outdoor shoots and dual memory slots for backup security. Full-frame sensors excel in low-light scenarios, while crop sensors provide budget-friendly flexibility without sacrificing quality.
Lens selection defines your visual language. Prime lenses (35mm, 85mm) deliver razor-sharp details for static displays—a cornerstone of lens car photography. Zooms like 24-70mm adapt to cramped showrooms or wide-track panoramas. “My 50mm f/1.2 immortalizes headlight textures like no other glass,” notes commercial shooter Dev Patel.
| Tool | Function | Expert Choice |
|---|---|---|
| Circular Polarizer | Reduces windshield glare | 77mm Multi-Coated |
| Three-Way Head Tripod | Enables multi-angle stability | Carbon Fiber Build |
| Wireless Trigger | Minimizes shake in long exposures | Bluetooth Enabled |
Support gear elevates work to a pro level. Sturdy tripods enable crisp twilight shots, while graduated ND filters balance bright skies against darker vehicles. For rolling shots, gimbals stabilize gear mounted on chase cars, maintaining focus during high-speed maneuvers.
Quality trumps quantity—a mid-range body with premium glass outperforms expensive kits with mediocre lenses. Match your gear to shooting scenarios: macro extensions for engine details, fast zooms for racetrack action. This approach ensures equipment grows with your skill level while maintaining creative control.
Invest in tools that solve specific problems rather than chasing specs. A well-curated kit enhances both technical reliability and storytelling potential, letting you focus on capturing automotive artistry at its finest.
Creative Composition and Angles in Car Photography
Turning metal and glass into visual stories requires more than technical skill—it demands an artist’s eye. Composition transforms ordinary shots into gallery pieces by guiding the viewer’s gaze through deliberate framing and perspective choices. Let’s explore how angles and spatial relationships elevate automotive subjects from snapshots to masterpieces.

Framing Techniques for Impactful Images
Low angles amplify a vehicle’s presence, making sedans look like predators and trucks like titans. Position your lens near wheel level to emphasize bold grilles or lifted suspensions. For convertible shots, frame the interior through an open door to create natural leading lines toward the dashboard.
Depth plays a crucial role in layered storytelling. Use foreground elements like foliage or architectural details to add dimension. A shallow field of focus (f/2.8-f/4) separates the subject from busy backgrounds while maintaining environmental context.
Using Leading Lines and Unique Perspectives
Roads, shadows, and even light trails become arrows pointing toward your focal point. Position vintage cars along curved driveways to mirror their body lines. “Shooting through chain-link fences adds gritty texture while framing modern muscle cars,” suggests urban photographer Rosa Mendez.
Break free from eye-level norms:
- Climb ladders for overhead shots highlighting roof designs
- Lie on asphalt to capture reflections in polished undercarriages
- Shoot through sunroofs to frame drivers against open skies
Experimentation breeds originality. Try tilting your camera 15 degrees during panning shots to inject motion into static scenes. Balance technical precision with bold framing choices—your lens becomes both microscope and paintbrush in this dance of light and steel.
Post-Processing Tips for Car Photography Perfection
The final magic happens not behind the lens, but in the digital darkroom. While sharp captures matter, thoughtful editing transforms good shots into show-stoppers. Start with RAW files—they preserve details in shadows and highlights that JPEGs compress.
Adjusting White Balance and Contrast
Metal surfaces and glass react uniquely to light. Use temperature sliders to neutralize orange streetlamps or blue twilight casts. Pro tip: Sample a neutral gray area like asphalt for accurate adjustments.
Boost contrast sparingly—overdoing it crushes tire tread details. Instead, adjust shadows and highlights separately. A slight “S-curve” in tone mapping adds depth without making chrome look artificial.
Enhancing Colors and Removing Distractions
Make paint colors pop by increasing vibrance 10-15%, not saturation. This preserves natural gradients on curved panels. Use gradient filters to darken overcast skies without affecting the vehicle’s finish.
Clone out parking lot lines or reflections using content-aware tools. Always zoom to 100% when retouching—what looks clean at full size might show artifacts when printed.
Editing is storytelling: Dodge headlight beams to emphasize their shape. Burn darker areas around wheel arches for added dimension. “Subtlety wins,” says retoucher Gwen Tanaka. “Viewers should feel the car, not the software.”
Avoiding Common Pitfalls in Car Photography Settings
Even seasoned photographers face unexpected challenges when working with glossy surfaces. Reflections and harsh light can turn sleek designs into chaotic mirror mazes if not handled properly.

Mastering Surface Challenges
Shiny paint jobs act like mirrors, capturing everything from clouds to your own silhouette. Polarizing filters become essential tools here—rotate them to eliminate unwanted sky glare or streetlight streaks. Position lights at 30-degree angles to create flattering highlights instead of direct hot spots.
Three things make a difference:
- Shoot during golden hour when sunlight is softer
- Use matte boards to block reflections from nearby objects
- Adjust your height to find “sweet spots” where distractions vanish
Professional retoucher Mia Chen advises: “Always check door handles and windshields—they’re reflection magnets. A slight tilt of your tripod often solves things.” Test shots with different apertures help identify problematic areas before committing to a setup.
When editing, use localized adjustment brushes to tone down specific glare points. Remember—some reflections add character, like subtle clouds on a hood. Your goal isn’t elimination, but intentional control.
Conclusion
Your journey from snapshots to gallery-ready automotive art begins here. We’ve explored how light sensitivity choices preserve metallic finishes and why shutter adjustments turn speed into visible drama. Remember: technical precision paired with creative risks yields unforgettable results.
Key takeaways? Master the exposure triangle relationship. Experiment with angles that make vehicles command attention. Quality gear matters, but your vision matters more. Every polished hood reflection and motion-blurred background tells your unique story.
This blog thrives because of people like you – enthusiasts chasing that perfect balance between mechanics and artistry. Share your progress in our comments section. Did golden-hour shots transform your workflow? What challenges did you overcome?
Growth happens through practice. Revisit these techniques during night shoots or crowded car shows. Each session sharpens your eye for detail while expanding creative possibilities. The people passionate about vehicles and visual storytelling inspire us daily – keep that energy alive.
Thank you for investing time in honing your craft. Now grab your gear, find intriguing light, and let those four-wheeled masterpieces shine through your lens. We can’t wait to see what you create next!
Frequently Asked Questions
How do I balance ISO, aperture, and shutter speed for moving vehicles?
Start with a fast shutter speed (1/250 or higher) to freeze motion. Pair it with a mid-range aperture (f/5.6–f/8) for sharpness and adjust ISO to maintain proper exposure. In low light, use a wider aperture (f/2.8–f/4) and raise ISO cautiously to avoid noise.
What’s the ideal depth of field for static car shots?
Use a narrow aperture (f/8–f/11) to keep the entire vehicle in focus. For artistic shots with blurred backgrounds, try f/2.8–f/4. Adjust based on lighting—wider apertures work well in golden hour, while smaller ones suit bright daylight.
How can I avoid blurry images when shooting cars in motion?
Set your shutter to 1/500 or faster for sharpness. Use continuous autofocus modes like AI Servo (Canon) or AF-C (Nikon). For panning shots, try 1/60–1/125 and follow the car’s movement smoothly to create motion blur in the background.
What settings work best for night car photography?
Use a tripod and long exposures (2–10 seconds) with low ISO (100–400). Combine this with a wide aperture (f/2.8–f/4) to capture light trails. For stationary cars, light painting with a flashlight adds dramatic details.
How do I reduce glare on a car’s surface during daytime shoots?
Shoot during golden hour or on overcast days for softer light. Use a polarizing filter to minimize reflections. If shooting in direct sun, position the vehicle at a 45-degree angle to the light source and adjust your angle to avoid hotspots.
What lens is recommended for capturing unique angles?
Wide-angle lenses (16–35mm) emphasize curves and environments, while telephoto zooms (70–200mm) isolate details. Prime lenses like 50mm f/1.8 offer sharpness for close-ups. Tilt-shift lenses can add creative perspective adjustments.
How important is white balance in post-processing?
Critical! Adjust it to match the scene’s lighting—cool tones for overcast days, warmer hues for sunsets. Use the eyedropper tool on neutral surfaces (gray wheels, white headlights) for accuracy. Subtle tweaks enhance realism without oversaturating colors.
Can I shoot cars indoors without professional studio lighting?
Yes! Use off-camera flashes or LED panels placed at 45-degree angles to the vehicle. Bounce light off ceilings or walls for softness. Shoot in RAW to recover shadows/highlights later. A low ISO (100–400) keeps noise minimal in dim spaces.
